Introduction
Zippers are more than just functional closures for bags; they're an essential element of design and functionality. Whether you're a seasoned seamstress or a DIY enthusiast, understanding how to incorporate zippers into your bag-making projects effectively can elevate your craftsmanship to new heights.
We'll delve into the nuances of installing zippers on bags in this extensive tutorial, which covers everything from installation methods to zipper repair.
Types of Zippers
Understanding the different types of zippers commonly used in bag-making is essential for selecting the right option to suit your design needs.
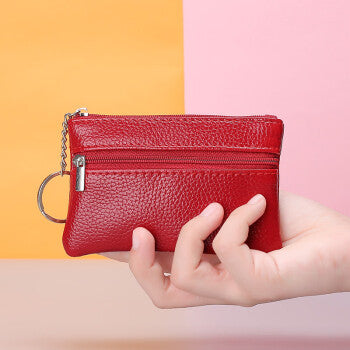
Standard Zippers:
Standard zippers, also known as coil zippers, are the most common type used in bag making. They consist of interlocking teeth, usually made of nylon or plastic, that run along a fabric tape. Standard zippers are versatile and suitable for a wide range of bag styles, from casual totes to structured handbags.
Invisible Zippers:
Invisible zippers feature a hidden coil mechanism that is concealed within the fabric tape, creating a seamless appearance when closed. This type of zipper is often used in garments and accessories where a discreet closure is desired. While less commonly used in satchel bags, invisible zippers can be incorporated into certain designs for a sleek and minimalist look.
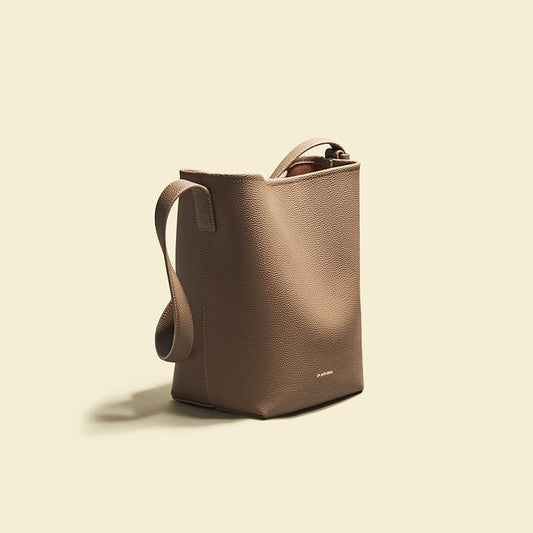
Fully-Enclosed Recessed Zippers:
Fully-enclosed recessed zippers are set into a groove or channel, creating a flush surface with the bag's exterior. This type of zipper offers a clean and streamlined appearance, making it ideal for bags where aesthetics are paramount. Fully enclosed recessed zippers provide added protection against the elements and are commonly found in high-end designer bags.
Comparison of Zipper Types
When choosing a zipper for your satchel bag project, it's essential to consider the specific requirements of your design as well as the desired aesthetic. Here's a comparison of zipper types and their suitability for different bag styles:
Backpack Zippers:
For backpacks, durability and functionality are key considerations. Standard zippers are a popular choice due to their strength and reliability, ensuring that the bag can withstand the rigors of daily use. Invisible zippers may be used for external pockets or compartments where a seamless appearance is desired.
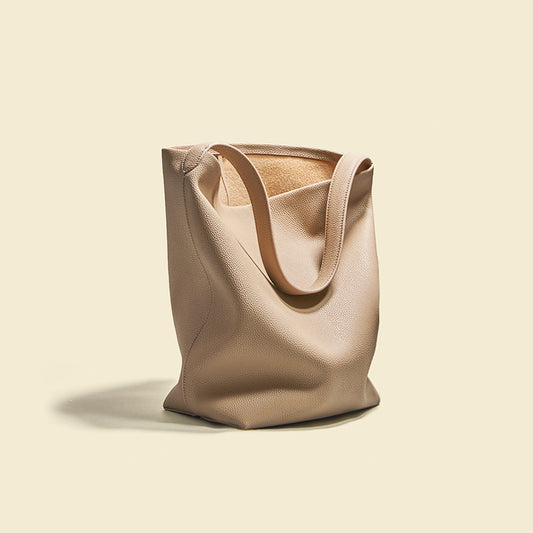
Tote's Zippers:
Tote bags often feature a more casual and relaxed aesthetic, making standard zippers a suitable option. The versatility of standard zippers allows for easy customization, such as contrasting zipper tape colors or decorative zipper pulls. Fully-enclosed recessed zippers can add a touch of sophistication to high-end tote designs.
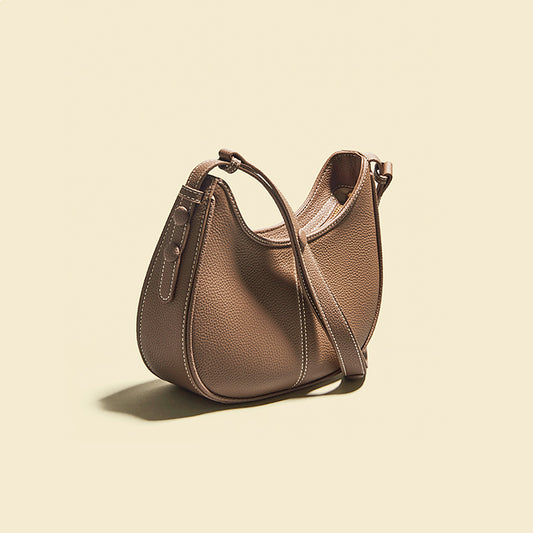
Handbag's Zippers:
Handbags require zippers that not only provide secure closure but also complement the overall design aesthetic. Invisible zippers may be used for discreet closures on interior pockets. In contrast, fully-enclosed recessed zippers offer a polished finish for premium handbag designs.
Handbag Zipper Installation Techniques
To achieve a polished and useful finish, installing zippers onto bags demands accuracy and focus on detail. Here, we'll explore step-by-step guides and special considerations for adding zippers to different types of bags.
Step-by-Step Guide on How to Sew a Zipper onto a Bag:
Prepare the Materials: Gather the necessary materials, including your chosen zipper, fabric, pins, zipper foot attachment for your sewing machine, scissors, and tailor's chalk or fabric marker.
Mark the Placement: Mark the location of the zipper on the fabric of your bag using fabric markers or a tailor's chalk. Ensure accuracy by measuring and marking both sides evenly.
Pin the Zipper: Align the teeth of the zipper with the specified line by placing it face down on the designated spot. The zipper can be temporarily secured by pinning it in place around the edges.
Put the zipper foot in place: Attach your sewing machine's zipper foot attachment. With the help of this unique foot, you can sew nearly the teeth of the zipper, guaranteeing a clean and uniform seam.
Stitch the Zipper: With the zipper foot attached, begin stitching along the edge of the zipper tape, starting at one end and sewing towards the other. Use a straight stitch or a zipper-specific stitch setting on your machine for best results.
Secure the Ends: Stitch across the ends of the zipper tape to prevent the zipper from sliding off the track. For additional strength, backstitch at both the beginning and conclusion of your stitches.
Test the Zipper: After the zipper is firmly in place, make sure it works smoothly by opening and shutting it a few times.
Detailed Instructions for Adding Zippers to Different Types of Bags:
Handbags: Handbags often require zippers for main closures or interior pockets. When choosing the kind and length of the zipper, take the handbag's size and design into consideration. For example, smaller handbags may benefit from shorter zippers, while larger handbags may require longer zippers for wider openings.Tote Bags: Tote bags typically feature top closures with zippers to secure contents. Ensure the chosen zipper length matches the width of the bag's opening for proper closure. When choosing a zipper, take into account the fabric's weight and durability of the tote bag as well.
Quilted Bags: Quilted bags present a unique challenge due to the multiple layers of fabric. Take care to stitch through all layers evenly to maintain the quilted pattern and ensure the zipper functions smoothly. Consider using a zipper with a wider tape to accommodate the thickness of the quilted fabric.
Leather Bags: Leather bags require special consideration when adding zippers due to the thickness and density of the material. Use a leather-specific needle and ensure precise stitching to avoid damaging the leather. Consider using a heavier-duty zipper to withstand the rigors of leather bag construction.
Special Considerations for Adding Zippers to Bags with Lining:
When adding zippers to bags with lining, such as handbags or tote bags, it's important to sandwich the zipper between the outer fabric and the lining to hide raw edges and create a clean finish. Follow these steps:
Cut two sets of fabric pieces for the outer bag and lining, ensuring they are the same size and shape.
Attach the zipper to one set of fabric pieces for the outer bag by following the steps outlined above.
With the zipper sandwiched between them, place the inside fabric pieces right sides together with the outside bag fabric.
Pin the layers together and stitch along the zipper tape, ensuring all layers are securely attached. To achieve a clean finish, turn the bag right side out and press the seams.
Instructions for Sewing a Hidden Zipper Pocket:
Hidden zipper pockets are a stylish and practical addition to bags, providing discreet storage for valuables while maintaining a sleek appearance. Follow these steps to sew a hidden zipper pocket into your bag:
Prepare the Fabric: Cut two rectangular pieces of fabric for the pocket lining and outer fabric. Ensure that the lining fabric is slightly smaller than the outer fabric to create a hidden pocket.
Mark the Pocket Placement: Determine the desired location for the hidden pocket on your bag's lining fabric. Use a tailor's chalk or a fabric marker to mark the pocket placement. Attach the Zipper: Place the zipper face down on the marked placement, aligning the teeth with the marked line.
Secure the zipper by pinning it around the edges.
Stitch the Zipper: Sew the zipper tape to the lining fabric by stitching along its edge while the zipper foot is connected. For strengthening, backstitch both the beginning and the end.
Position the Pocket: Place the lining fabric right side together with the outer fabric, sandwiching the zipper between them. Pin the layers together, ensuring the zipper is aligned with the marked placement.
Stitch the Pocket: Sew all the way around the pocket, leaving a tiny gap for turning. Clip the corners and trim the seam allowance.
Turn and Press: To get a clean finish, turn the pocket right side out through the opening and press the seams. Close the gap with a hand or machine stitch.
Test the Pocket: Test the functionality of the hidden pocket by opening and closing the zipper. Ensure that it operates smoothly and securely.
Repairing Zippers
Zippers are subject to wear and tear over time, but knowing how to troubleshoot and repair common zipper issues can extend the life of your bags. Here, we'll explore troubleshooting tips and step-by-step guides for repairing zippers in different bag styles.
Troubleshooting Common Zipper Issues:
Fallen Zipper: A fallen zipper occurs when the slider fails to close the teeth properly, causing the zipper to separate. To troubleshoot this issue, check for any obstructions in the zipper teeth and gently realign the slider back onto the track.
Detached Zipper Slider: If the zipper slider becomes detached from the teeth, it can usually be reattached using a pair of pliers. Gently squeeze the sides of the slider to open it slightly, then slide it back onto the teeth in the correct orientation.
Broken Zipper Pull: If the zipper pull breaks off, you can replace it with a new one or fashion a makeshift pull using a paperclip or piece of wire. Thread the paperclip through the hole in the slider and bend it into a loop for easy gripping.
Tips for Reattaching a Zipper Slider and Repairing Zipper Pulls:
Use needle-nose pliers to manipulate the zipper slider back onto the teeth gently. Be careful not to force it, as this can damage the zipper. If the zipper pull breaks off, consider using a keyring or a decorative charm as a replacement. All you have to do is insert it through the slider's hole and fasten it with a tiny jump ring or wire loop.
For zipper pulls that are difficult to grip, consider adding a small piece of fabric or ribbon to create a larger, more ergonomic pull tab. Step-by-Step Guide on Repairing Zippers in Different Bag Styles:
Handbags: To repair a zipper in a handbag, carefully remove any loose threads or debris from the zipper teeth. Use needle-nose pliers to realign the zipper slider and test its functionality before reattaching it to the bag.
Tote Bags: For tote bags with zipper closures, inspect the zipper track for any bent or damaged teeth. If necessary, use pliers to straighten them out before lubricating the zipper with a silicone-based lubricant to improve its performance.
Quilted Bags: When repairing zippers in quilted bags, take care to avoid damaging the delicate fabric. Use a light touch when manipulating the zipper slider, and consider reinforcing the surrounding fabric with interfacing for added durability.
Leather Bags: Repairing zippers in leather bags requires extra caution to avoid scratching or damaging the leather. Use a soft cloth to protect the surface of the leather while working, and avoid using excessive force when manipulating the zipper slider.
Conclusion
In conclusion, we encourage you to experiment with zipper techniques and explore new possibilities in bag making. Whether you're adding decorative zipper accents, experimenting with different zipper styles, or sewing fully enclosed recessed zippers, the possibilities are endless.
With dedication, practice, and a willingness to explore, you can unlock the full potential of zippers in handbag making, creating stylish and functional accessories that reflect your unique style and personality.