If you're anything like me, you enjoy the aesthetic appeal of embossed leather but dislike how difficult it may be to remove the imprints that were created during the embossing process. I'm going to demonstrate a couple of techniques in this post for removing embossing from leather using heat and chemicals. Let's get going!
Leather is a natural substance created from an animal's skin. It is utilized in many different things, like apparel, footwear, furniture, and more. Leather is resilient and has a distinctive aesthetic that appeals to many individuals. However, one drawback of leather is that surface imprints or embossing can be difficult to remove. This is because leather is porous, making it simple to leave impressions behind when it is pressed.
Detailed Guide for Removing Embossing from Leather
First Technique: Heat
You might be thinking about utilizing heat if you want to get rid of the embossing on leather. After all, a variety of marks may be removed from a variety of surfaces using heat.
Unfortunately, heat isn't always successful in removing embossing from leather, even if it occasionally can. In certain instances, applying heat makes the issue worse.
Use caution if you do decide to try heating leather to remove embossing from it. Start with a low setting and gradually raise the temperature until you discover one that appears to be effective without endangering the leather.
You'll need a heat gun, a hair dryer, and a clothes iron.
Step 1: Select the Appropriate Heat Setting
It's crucial to choose the proper heat setting before you begin using heat to remove embossing from leather. Depending on the kind of leather you're dealing with and the level of embossing, this will change.
Next, apply heat.
You may start heating the embossed area once you've chosen the right heat setting. If you're using a heat gun, move it back and forth across the surface while holding it approximately 6 inches away until the embossing begins to lift.
When using an iron or clothes iron, cover the area with a thin towel and apply pressure. The embossing will then begin to lift as you rock the iron back and forth.
Another option is to use a hairdryer. Direct the heat toward the embossed region while holding the object around 6 inches away from the surface.
Step 3: Eliminate the Emblazoning
You may remove the embossing from the surface as it begins to lift. Rub any leftover material away gently with a soft cloth.
Try using a tiny bit of rubbing alcohol on a soft cloth if the embossing is proving hard to remove. Till the embossing disappears, rub the towel over the affected region.
Condition the leather in step four.
The leather must be conditioned once the embossing has been removed. Its natural oils will be restored as a result, preventing drying out.
Use a delicate cloth and a tiny quantity of leather conditioner to massage the surface. Before cleaning away any excess, give the conditioner at least 15 minutes to absorb into the skin.
- Always use moderate heat when attempting to remove embossing from leather. The surface may be harmed by this.
- You might try using a tiny bit of rubbing alcohol on a soft cloth if the heat doesn't appear to be working.
- After you've taken the embossing off the leather, be careful to the condition it. Its natural oils will be restored as a result, preventing drying out.
Second Approach: Vinegar Use
Although vinegar may sometimes be used to remove embossing from leather products, this method is not always successful. If you do want to follow this path, make careful to protect the leather by using a soft cloth and a weak vinegar solution. A small, discrete leather area could be a good place to try out this technique first.
You'll need to have:
- A bowl
- White vinegar, 1 cup
- water, 1 cup
- a spotless cloth
Step 1: Picking the Best Workplace
Choose a spot with lots of natural light and good ventilation. Additionally, you'll need to remove all other items from the area to make sure you have enough room to work.
Mixing the vinegar solution in Step 2
1 cup of white vinegar and 1 cup of water should be combined in a bowl. Mix the ingredients by stirring.
Applying the Vinegar Solution in Step 3
Your clean cloth should be moist but not dripping wet after being dipped into the vinegar solution. Gently, circularly rub the towel over the imprinted region.
Step 4: Monitoring Your Development
Check to see whether the embossing starts to disappear after a while. If it is, keep rubbing until it disappears. If not, you might need to try a different approach.
Step 5: Concluding
Rinse the area with clean water once the embossing has been removed, then dry it with a soft towel. If you'd like, you can condition the leather.
Things to Keep in Mind:
- Leather embossing can sometimes be difficult to remove with vinegar.
- Use a soft cloth and a vinegar solution that has been diluted if you wish to attempt this procedure.
- A small, discrete leather area could be a good place to try out this technique first.
Utilizing chemical strippers is Method 3.
You might have to use chemicals if you're dealing with a huge piece of leather or if the first two techniques didn't work for you. You must start by taking all the appropriate safety measures since chemical strippers may be quite harsh. Additionally, you should try the stripper on a tiny, discrete piece of leather first to be sure it won't harm or stain the material.
What You'll Need Is:
- chemical deodorizer
- Paintbrush
- ratty old Latex gloves
- security glasses
- respiratory mask
Determine Which Type of Stripper to Use in Step 1
Chemical strippers can be divided into two categories: solvent-based and water-based. Water-based strippers are gentler and simpler to use, but they don't perform as well on stubborn stains. On the other hand, solvent-based strippers have a lot of strength but can be harmful to use.
Make sure the solvent-based remover you use is intended exclusively for use on leather if you decide to go that route. Choose a safe solvent because many others will harm the material.
Step 2: Get the Area Ready
Take some safety measures before you begin to remove the leather. Wear safety goggles and latex gloves, and make sure the space you're working in is well-ventilated. To shield neighboring surfaces from spills, it's a good idea to cover them with an old rag or sheet.
Apply the Stripper in Step 3
When you're ready, apply the stripper to the troublesome region using a paintbrush. Because certain strippers must be kept on for a certain period before they work, be sure to carefully read the label instructions.
4. Remove the stripper by wiping it.
After the stripper has had a chance to work, remove it with an old rag. Before all of the embossing's are eliminated, you might need to use additional strippers and repeat the procedure numerous times.
Fifth step: Disarm the stripper
It's crucial to neutralize any remaining solvent if you employed a solvent-based stripper before finishing. This will lessen the likelihood of the leather becoming stained or damaged. This can be accomplished by using a water-based cleaner or wiping the surface down with a moist towel.
After you're done, carefully wash your hands and any other exposed flesh.
You can quickly and effectively remove embossing from leather by following these five easy methods! Just be sure to use the right kind of stripper for your job and follow all required safety measures.
Keep in mind:
- Chemical strippers may be harsh, so be sure to take all essential safety measures before starting.
- To ensure that the stripper won't harm or alter the color of the leather, test it on a tiny, discrete patch of leather first.
- Although solvent-based strippers are quite effective, using them can be risky.
- Make sure the solvent-based remover you use is intended exclusively for use on leather if you decide to go that route.
- After you've done stripping the leather, wipe up any residue by rubbing a damp cloth over the area or using a water-based cleanser.
Conclusion:
The longer the embossing process has been in place, the longer the leather will need to rest and recover. However, overall, it seems that most people are successful in their attempts at removing leather embossing.
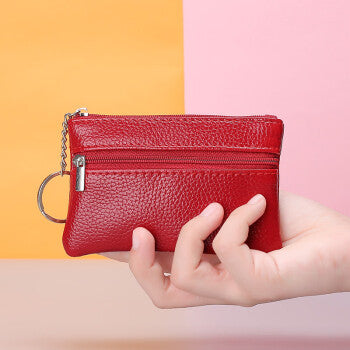
Leather embossing is a popular and fashionable design element, used on clothing and leather bags. However, if you've ever had your hands on a leather bag or jacket that's been embossed and you don't like it, you'll know how difficult it can be to remove the embossing from leather.
The point is to use cleaner, not lighter fluid or a heat gun. If the glue won't come off with scraping and brushing then you need to use alcohol or something stronger like WD-40 and acetone.
And that wraps up our guide on how to remove embossing from leather, as well as our other blog entries.
Hopefully, these methods above have been of some help to you. If you have any questions or comments on this article, please feel free to share them at the bottom of the page. We look forward to hearing from you!